Everyone likes personalizing their space. As a kid, I didn’t have much under my influence yet, but I could move things around in my room if I wanted to, so I did! Now as an adult, I have fun imagining new furniture or artwork, or even completely changing the layout of a room.
Your own personal space
It shouldn’t be surprising then, that in VR it’s also common to want control over your home environment. Meta includes about a dozen home environments you can choose from, but you don’t want to be limited to just those! Unfortunately, there’s no easy way from Meta to add additional homes or virtual objects, but that doesn’t mean that you can’t do it. So, let’s go through your options for making your ultimate virtual space.
First there are two concepts to understand: the environment and the skybox. These are part of any 3D environment, and your Quest (or other headset) home is no exception.
The Environment
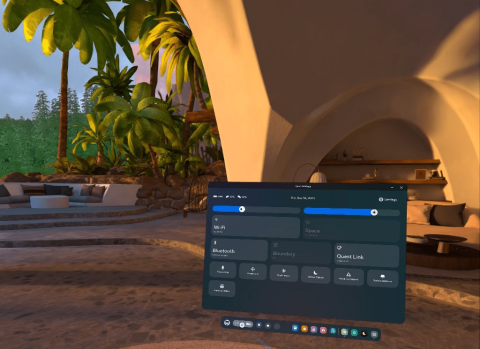
When you appear in VR, the immediate area you see is your home environment. At a minimum, it’s a floor, but more likely it’s more like a ski lodge, a modern apartment, a spaceport, or various other themes. You can move around within a limited area, and this is where you return when you aren’t using an app. These are fully 3D and are immersive experiences on their own. They are very limited spaces though, so you can’t just have a 25-room mansion or an entire museum as your home. Even still, they can be fun on their own, and with recent versions of the Quest 2 and 3 software, you can even invite a friend over to visit your home!

The Skybox
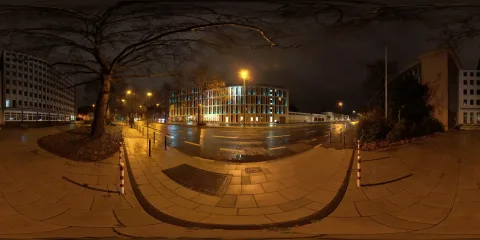
Look outside of your immediate environment. There could be mountains, or water, or just pastel colors in the distance. You can’t interact with it though. Your environment is basically a floating plane inside of a sphere. The sphere has an image on it that acts as your sky and horizon (think The Truman Show). The image projected onto the sphere is called the skybox. For many Quest environments, you can customize your background imagery by selecting a different skybox. Unlike the 3D environment, the skyboxes are flat. It’s also fairly easy to add your own if you know how (or make your own if you have a 360° camera).

Selecting new custom skyboxes
Customizing your home with a custom skybox is a quick, easy way to make your mark. Change the horizon to ocean, or mountains, or a giant underwater scene. Here are some options for finding a new skybox that you like.
Option 1: Find a premade skybox image
You can find some 360° photo spheres/panorama online if you search a bit. There are a few web sites that host libraries of them, but many of them cost money or else you get a watermark. You can also do Bing/Google searches to find 360 images that people have posted on blogs or in articles. Try search terms like “360 panorama” or “360 photo”. Just make sure that you get the largest size that you can. 4K sounds big when you’re watching a movie, but for a 360 image, that’s about the minimum required for a nice view.

Option 2: Capture your own skybox as a photo
The nice thing about a skybox is that it’s just an image, like any other JPG or PNG. Any 360° image/photo can be used, although some will work better than others. If you have certain cameras like the Insta360 ONE X2, or the Insta360 GO 2, you can just take a photo, copy it to your headset (use the USB-C cable), then select it. You’ll want the highest quality and resolution you can get in order to have a good effect, and remember that you’ll only see the upper half of the image (the rest is below your home floor) so compose it with that in mind.
Option 3: Create a custom skybox with AI
Finally, you can generate your own skybox using AI with Blockade Labs or through an app like Moon VR Home (more details below). Like other image generators, you provide a text prompt (“A large city park with paths and railings and bushes”) and optionally what you don’t want to see (i.e. “dogs, strollers”) and you get back a custom creation to use. It can take a few times to get it right, but it’s a lot of fun!
Blockade used to be completely free while it was in beta, but now it only allows five generations without an account. With a free account you can get 15 generations/month, with plans starting at $10/month for more flexibility.
Selecting new home environments
Moving onto the more complicated part, it’s not quite as trivial to find a 3D scene to use as your home. Not only are 3D scenes more complicated to make in general, but you also need to tell your Quest about it so it will install it and let you select it. There are three ways we’ll cover for changing up your home. There’s also the completely custom route of making your own 3D models, but that’s way beyond the scope of this article.
Option 1: Meta environments
Before we dive into anything custom, make sure you know how to choose from the built-in options. This is pretty easy since it’s built-in as part of the Settings app. There’s a collection of spaces to choose from, and it’s as easy as activating the thumbnail. It may need to download the environment the first time, but that’s pretty quick.
To choose an environment:
- Use your right controller to pull your universal menu (the Meta button or older Oculus button depending on your headset model).
- On the left side of the menu, hover over the clock and click/activate Quick Settings when it appears.
- In the top-right corner, click/activate the Settings button (gear icon).
- Along the left, look for Personalization (the pencil icon) and click/activate it.
- You should now see thumbnails of your options. Click/activate the one you want. You can do this any time.
The options are nice, but there are only so many to choose from.
Option 2: Environments bundled with apps
This isn’t something you can search the store for, but some apps include custom environments. I’m not sure if this is difficult to get approval for from Meta, but it’s not very common. A custom Lord of the Rings home was added at one point courtesy of Amazon, but I’m not sure how to get it if you buy a headset now. The virtual travel app BRINK Traveler also includes a home based on a scaled-down version of its Horseshoe Bend location. More recently, I noticed that the game Asgard’s Wrath 2 also includes a custom environment. They just come along with the app with no extra steps and you activate them just like any other option.
Option 2: Sidequest custom homes
If you want lots of options, you’ll need to install Sidequest. There’s a whole section of custom environments to choose from, many fan-made settings from movies or TV shows. Once you find the home you like, click the Install button like you would for an app. After installing them, you’ll still need to go to the Quest settings page to actually activate the one you want, so don’t expect any effect after the installation. Thought the home install process is pretty easy, getting Sidequest installed can be a chore the first time. Follow their directions to get started.
Option 3: Moon VR Home (App Lab)
Another interesting option is the app Moon VR Home. This lets you choose from a large library of custom home environments (although many can also be found on Sidequest) and also skyboxes. What really makes Moon VR Home stand out is that you can choose from a small set of a dozen or so basic spaces and customize them with wall artwork, sounds, and 3D models. It also includes an AI skybox generator so you can go as custom as you want. In order to actually get a custom home installed requires additional steps, but if you really want to make your mark on your virtual space, this is the way to go! Thankfully, the site has instructions on what you need to do after you make your selections.
Get started: https://www.moonvrhome.com/download
Giveaway!
I’m excited to say that we have a free copy of Moon VR Home to give away! All you need to do to enter is to share this article on Twitter/X, Facebook, or LinkedIn. Spread the word for a chance to win! I’ll announce the winner on December 1st.

